Rotary Table Restoration
- Nov 26, 2025
- 2 min read
A Simple Clean-Up
I recently acquired a 6" rotary table, and while it was in working condition, it was a bit rough around the edges. It had some light rust on the unpainted surfaces, and there was some slop in the rotary mechanism. There's no branding on it, so I don't know that it's an especially high quality tool, but I'll try to give it the best second life it can have.

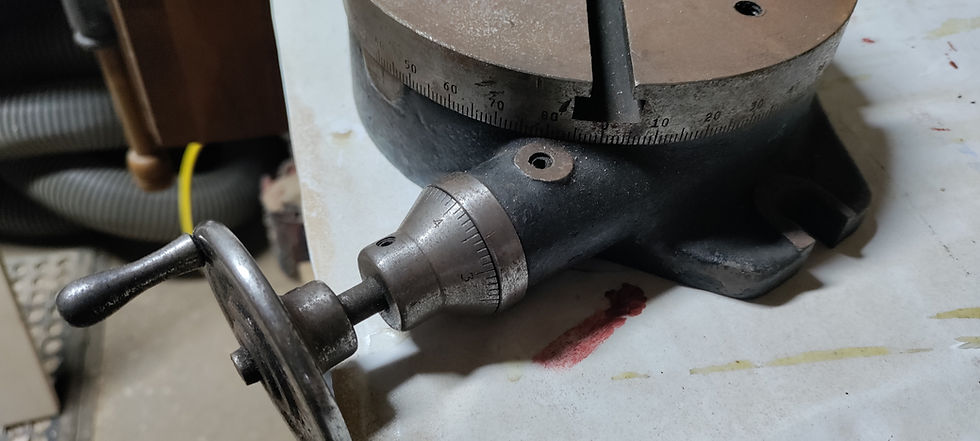
The rotating shaft is the first part to get disassembled. Just one grub screw holds the shaft in place, so after loosening that, and with a bit of coercion, the mechanism can slide out. The worm gear on the back end of the shaft is what turns the rotary table. The bronze bushing keeps it seated accurately in the hold, and fortunately, it appears to be in good condition.

Getting the handle off the shaft proved to be a challenge. The tiny grub screw in the picture below was seized even after soaking it overnight in penetrating oil. I decided I would need to try loosening the screw with as much force as possible, even if it broke my allen wrench. After exerting more force than I ever have on an allen wrench of this tiny size, there was a sudden snap. I was certain I either broke my wrench or stripped the head of the screw. To my surprise, the threads had broken free and I was able to take the screw out without further drama.
I still had to lightly hammer the shaft out of the other pieces. I don't know if they were originally pressed on or if it was just a bit of corrosion that made everything immovable.

On the underside of the main body, the plate held with four screws is what keeps the top table attached to the bottom of the body. Once the plate is off, they simply slide apart.


At this point I could start cleaning pieces. I used my lathe to mount a couple pieces to expedite a bit of sanding and polishing. The rest of it was just done with elbow grease.
I thought about repainting a couple of the areas, but decided to leave the "patina" as a reminder of its first life. Here's the handle after a bit of sanding and polishing:

And the little dial indicator was much easier to read after cleaning it up.

After cleaning up the base, the table, and other bits and bobs, I greased the guts and reassembled. I was able to tighten up the slop, and it's definitely operates more smoothly than before. And of course, it doesn't actively have rust eating away at it. Job done!


Comments